20 Things You Should Do Right After You Start A Blog
Just started your first blog?
Congratulations! You’re now on your way to making passive income.
If you’re not sure what to do next after purchasing a domain, hosting, and setting up WordPress, don’t fear.
Setting up a blog can be very daunting if you don’t know what you’re doing and you’re a total beginner but I’ve got you covered in this post!

But before we continue, if you haven’t started your own blog yet, I highly recommend that you check out my step-by-step tutorial where I walk you through how you can quickly set up your own blog for just $2.95 per month.
20 Things You Should Do Right After You Start A Blog
After getting your hosting and domain set up, here is a checklist of 20 things you’ll want to complete that will help create the right foundation for you to start making money from your blog.
This post focuses on WordPress because that is what I use and recommend. However, some of these steps will also apply if you use another platform such as Wix or Squarespace.

Start A Money-Making Blog In Just 5 Days
Join the FREE email challenge to start your own profitable blog in just 5 days when you join our newsletter.
1. Install a WordPress theme
The first thing you’ll want to do after starting a blog is to choose a WordPress theme and install it on WordPress.
I recommend using Kadence child WordPress themes, which will require the Kadence Framework.
Some themes are free but I like using paid ones because they usually look more aesthetically pleasing and professional-looking, have more features, are more SEO-friendly, and often have better creator support when you have questions or need help.
Check out my post on my favorite feminine and elegant WordPress themes that are perfect for female bloggers and entrepreneurs if you’re looking for a good quality theme.
2. Add Your Blog Logo
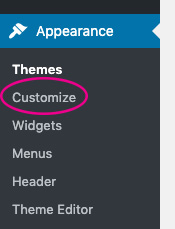
After installing a WordPress theme, you’re going to want to go to Appearance –> Customize in your WordPress sidebar for the next few steps.

In this step, upload your site logo which includes your blog’s name and tagline (optional).
If you’re looking to create a blog logo, you can easily purchase a logo created by a freelance graphic designer on Fiverr for a very affordable price.
3. Set Up Your Site Identity

Under the Site Identity tab, you’ll want to input your blog name and your site’s tagline.
For the site icon, you’ll want to upload your own favicon. It should be at least 512 x 512 pixels, be a square shape, and have a transparent background.
If you’re looking to create your own favicon, a great place to do this is Canva.
4. Set Up Your Home Page
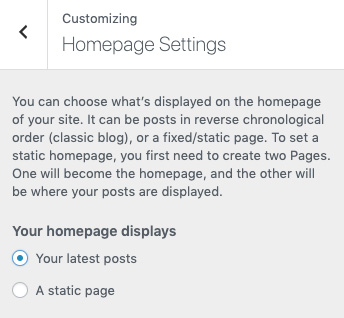
Next, you’ll want to set up your home page layout.
You can set your WordPress settings in 2 ways:
- Shows your most recent posts, or
- Make it a static page (where it shows a variety of things such as a welcome message to your readers, a little blurb about what your blog is about, a newsletter sign-up area, categories for your blog, and a few recent post excerpts)
How you want to set up your homepage is up to you!
5. Add WordPress plugins
WordPress plugins are a great way to customize your site for your readers so have fun choosing your plugins.
Just remember that you only want to add plugins to your site that are necessary and functional because having too many plugins on your site can cause your site speed to really slow down. A slow site is a no-no for SEO and degrades the user experience.
If you are not sure which plugins to use, I recommend that you check out my list of 10 of the best free WordPress plugins for beginner bloggers.
6. Set Up Your widgets
If you have a sidebar or a bottom widget area in your WordPress layout, adding widgets is a great way to add functionality to your website.
From an about me section, social media icons, and an email subscription sign-up prompt, it’s up to you to choose what you want to add to your site. So experiment away!
Head to your WordPress sidebar and go to Appearance –> Widgets.

Above, you can see how my widgets area looks like with an easy drag-and-drop customizer.
Your widget area will probably look quite different depending on the WordPress theme that you’re using.
7. Choose A Permalink Structure
Before writing any posts, it’s important to set up your permalink settings, which is how you set up the structure of your URL.
Head to your WordPress sidebar and go to Settings –> Permalinks.
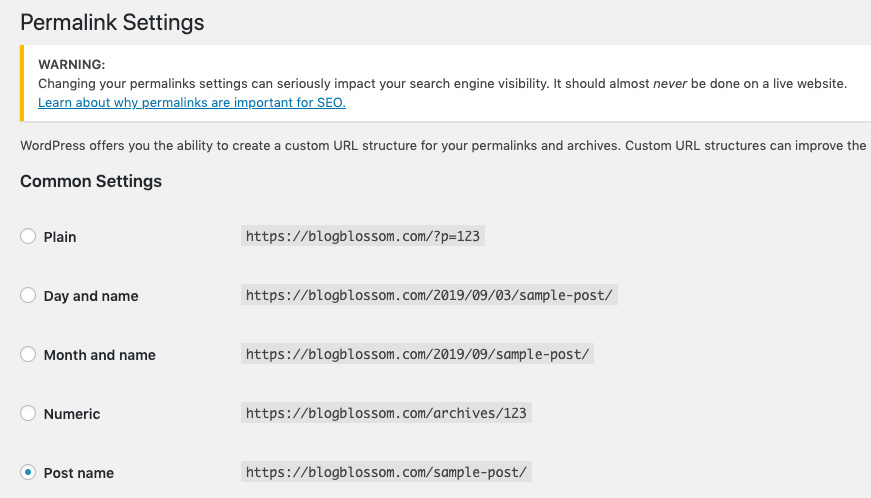
For my blog, I’ve chosen the post name setting so that my posts’ URL will always show as http://blogblossom.com/sample-post/.
This setting is recommended because it doesn’t include the date of the post or any category names. Both of these things can change as your blog grows and evolves and you might want to eventually update your posts at a later date.
8. Write Your About Me Page
An about me page is such an important page when a new reader stumbles upon your blog because people love learning more about the person behind the writing.
To gain loyal readers and keep your readers coming back, you’ll want to create a page that shows your reader what your site is about and the specific ways you can help them.
Make sure that you are creating a page instead of a post as it is a static page.
9. Create A Contact Page
If you’re creating a blog that makes money, you’re going to want to have a page that tells your audience, other bloggers that want to collaborate with you, and potential brands on how to contact you.
You should also be creating a page for your contact page instead of a post as it’s a static page, just like the about me page.
10. Set Up Your Menu
Once you’ve set up your about me page and contact page, you’ll want to set up your main navigation menu.
Head to your WordPress sidebar and go to Appearance –> Menus.

Here you can see that I added my about me page as well as the contact page to my main navigation. I’ve also added some categories of my blog as well.
11. Write Up Your Legal Pages
Starting a blog and not being legally covered can be a very scary situation. This is why it’s so important to protect your blog with privacy, terms and conditions, and disclaimer pages.
There are a ton of free templates that you can find online but these won’t protect you legally, unfortunately.
If you’re stuck on what to write in your terms and conditions, privacy policy, and disclaimer pages, protect yourself with The Legal Templates Bundle written by Amira Law (who is a full-time lawyer and a part-time blogger) specifically for bloggers. You’ll be done editing it in less than an hour and have the peace of mind that you’re protected.
She also includes GDPR compliant legalese which is great if you have an audience from the EU.
Read my full review on the Legal Template here.
12. Set Up A Footer
Once you’ve got your legal pages sorted out, you can set up your footer.
Go to your WordPress sidebar and click Appearance –> Theme Settings –> Footer.

It’s ideal to link to your contact, privacy, terms and conditions, and disclaimer pages in this footer area so that your readers have easy access to them.
13. Get GDPR Compliant
Being GDPR compliant is so important if you have an audience from the EU.
The GDPR was set in place on May 25, 2018, so make sure that you are compliant or else you can be fined big bucks!
I recommend checking out the GDPR Compliant Blog course by Lucrezia, who is a lawyer and a blogger. She teaches you how to make sure your blog is totally compliant and is so knowledgable in this field.
14. Set Up An Email Address
Setting up a professional email is important if you are looking to get sponsorships and work with brands in the future.
You can create an email with your host or you can use an external email provider like Zoho Mail where you can create an email using your own domain name. I recommend skipping email providers such as gmail.com or outlook.com.
15. Sign up for an email list provider
An email list is so important if you’re going to start a profitable blog because it’s not owned by anyone but you.
This is because when traffic is down from your social media channels or your posts aren’t performing well on Google due to algorithm changes, you’ll still be able to rely on your email list to bring traffic to your blog.
Mailerlite is my choice of email service provider to send out campaigns on my list. It’s free to use up to 1000 subscribers.
16. Set Up Your Social Media Accounts
Next, choose the appropriate social media channels that you feel your blog’s audience hangs around and create your social media handles for your site.
Ideally, you want the same name as your blog as it looks more official and it makes it easier for your readers to find you when they search for your blog name.
Only choose a few social media channels that are appropriate or else you’ll be spreading yourself too thin and it will just be a waste your time.
I highly recommend using Pinterest & Tailwind (get 1-month free with my link here!) together if you’re just starting out because it can get you quite a bit of traffic in a short amount of time!
Check out my beginner’s guide on how to set up and optimize your Pinterest account to set yourself up for success on the platform.
Side tip: It might be a good idea to claim all of your names on all social media channels though regardless if you’re using them or not, just in case you do want to use them in the future.
17. Create foundational content
Having enough content before you launch your blog is important to give a great experience to your readers.
Imagine if you found a blog that only had 2 or 3 posts and you found their posts informative. You probably would be interested in reading more but without more posts, that’s not possible. That can deter you from ever coming back to their blog.
I recommend having some content already on your blog before launching. A good number to have is at least 10 good quality posts already written out before you start promoting your posts.
If you’re looking to create more content in a shorter period of time, I encourage you to use Grammarly to cut down the time it takes to edit and proofread your posts.
Also, check out my post on how to write blog posts faster so you can be more efficient and save time.
18. Create a sitemap and upload to Google Search Console
If you want to rank on Google eventually for traffic, you’re going to need to create a sitemap so that Google can crawl your site.
Create an account and verify your blog on Google Search Console.
Make sure you have the Yoast SEO plugin installed on WordPress.
Then go to your WordPress sidebar and find SEO –> General.
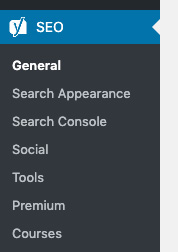
When you’re in the General settings of Yoast SEO, click on the Features tab.

Scroll down to see the XML sitemaps section.
Make sure sitemaps is set to ON and then click the ? button.
After, click the “See the XML sitemap” phrase and a new window will pop up that shows your site’s XML sitemaps.
For example, you can see my site’s XML sitemap for my posts below.

Next, go back to Google Search Console and add the sitemap name you generated.

Your posts will then be crawled by Google within the next few days and weeks. You’re now on your way to getting traffic from Google!
19. Sign up with influencer networks
If you’re planning to monetize your blog with sponsored posts in the future, it’s a great time to sign up with influencer networks that will accept new bloggers.
Check out my post on 10 influencer networks to join to start making money as a new blogger.
20. Sign Up With Affiliate Programs
If you’re planning on incorporating affiliate marketing, you’ll want to join affiliate programs so that you can monetize your posts from the get-go. It’s never too early to start!
Check out my post on the 7 best affiliate programs for beginners.
More Blogging Tips For Beginners
- 8 Things To Do After You Publish A Post For Success
- 8 Ways To Drive Traffic To Your Site For Free
- How To Legally Protect Your Blog And Business With Legal Contracts
- 50+ Tools & Resources To Run A Profitable Blog
- 6 Ways To Make Money Blogging Online
Liked this post? Please share it!
Awesome tips!
Finally a post with actual help!
Thank you so much for this tips, it helped me a lot!
Handy, simplified list of the basics! Thanks so much. I’m a blogger also and I’ve written some blogging tip posts but this is really great with the steps for WordPress.